Showing posts with label Printable. Show all posts

Wednesday, August 15, 2012

Organize: Coupons

I have been couponing on and off for about a year now. I have gone to strategy classes, read books, and researched how others organize their coupons to best utilize their savings. I don't like to spend a lot of time clipping, storing, and rummaging through a bunch of clippings in order to save $0.40 on eight items (and only then, if its not expired). At the same time, a tight budget means more motivation for me to figure out a way to make it work for me. In that effort, I have taken little bits of different strategies to make my own, and I am constantly revamping it.

For me, a physical organizational system is key to getting me to actually give it a shot. It also must be attractive, so I am happy (or even excited) to use it. Again, I couldn't find something that fit my personal organizational needs, so I buckled down and made my own. Yes, I am posting it as a freebie too.

Now the physical organization takes an initial time investment. But it is well worth it when you don't have to spend the time looking for lost and crumpled coupons floating around in your purse and pocket (yes, personal experience does help the cause on this one...)

First: collect your coupons. (Expired coupons can be donated to the military! Did you know that? Just found out myself!)

Second: Separate your coupons into categories. (ie. Food, beauty, pets, etc.) I used tabs in my binder for each of my categories. I also made the divider pages to go with it. You can find them here:
Coupon Binder Dividers
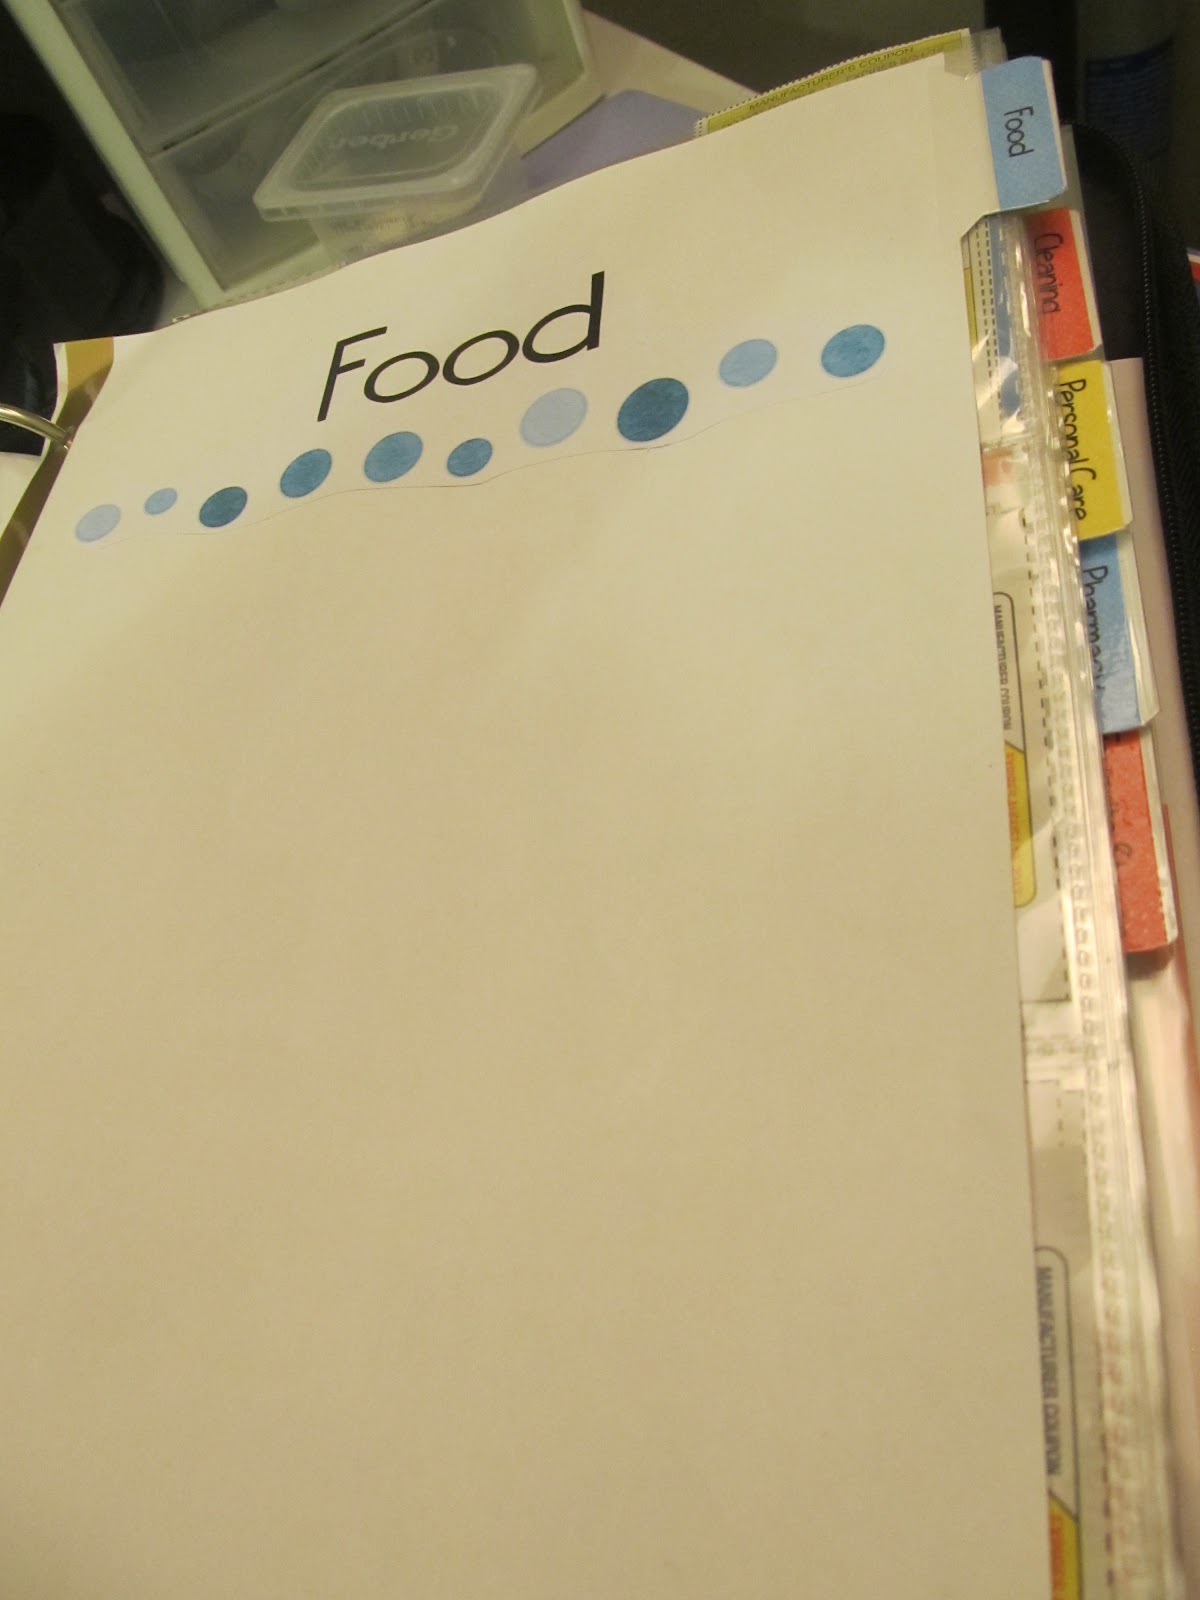


Next, organize coupons as desired within the selected category. I use a new page for each type of coupon. For example, in the food section I have a page for dairy coupons, a separate coupon for frozen, etc. I've made it easier to tell what page I'm looking at by attaching a tag to the pocket with a paper clip (that way, they are still movable should the need arise). These can be found here
Coupon Binder Organizer TabsYou will find my flag tags for types of coupons, along with months, "use by" tags (that can be laminated for reuse) and store name tags. I also included some blank ones so it is more custom to your personal style. 
I used double sided tape for categories I know I'll keep around as their own page...
For most categories I used paper clips to keep things flexible within the inner workings of the binder. That way, as coupons change in and out I can keep things clearly labeled. I hope these will help you as you organize your coupon loveliness too! Please leave a comment if you do use them and tell me what you think! (or you could leave a comment anyway.)


 There are a variety of different sections but I made sure to include a "Favorite Stores" section to keep my store coupons separate from my manufacturer's coupons. It helps me know where I need to pick certain items up.

As for the "Use by ___" labels, I am not yet organized enough to use them fully. I saw them while internet surfing and thought they were a good idea. Laminate them and use a dry erase marker to keep track of expiration dates, etc. 

Hope you like it! Please,let me know if you do use it! And good luck organizing! 

Friday, July 20, 2012

Organize: Coupon


I have been couponing on and off for about a year now. I have gone to strategy classes, read books, and researched how others organize their coupons to best utilize their savings. I don't like to spend a lot of time clipping, storing, and rummaging through a bunch of clippings in order to save $0.40 on eight items (and only then, if its not expired). At the same time, a tight budget means more motivation for me to figure out a way to make it work for me. In that effort, I have taken little bits of different strategies to make my own, and I am constantly revamping it.

For me, a physical organizational system is key to getting me to actually give it a shot. It also must be attractive, so I am happy (or even excited) to use it. Again, I couldn't find something that fit my personal organizational needs, so I buckled down and made my own. Yes, I am posting it as a freebie too.

Now the physical organization takes an initial time investment. But it is well worth it when you don't have to spend the time looking for lost and crumpled coupons floating around in your purse and pocket (yes, personal experience does help the cause on this one...)

First: collect your coupons. (Expired coupons can be donated to the military! Did you know that? Just found out myself!)

Second: Separate your coupons into categories. (ie. Food, beauty, pets, etc.) I used tabs in my binder for each of my categories. I also made the divider pages to go with it. You can find them here:
Coupon Binder Dividers


Next, organize coupons as desired within the selected category. I use a new page for each type of coupon. For example, in the food section I have a page for dairy coupons, a separate page for frozen, etc. I've made it easier to tell what page I'm looking at by attaching a tag to the pocket with a paper clip (that way, they are still movable should the need arise). These can be found here
Coupon Binder Organizer TabsYou will find my flag tags for types of coupons, along with months, "use by" tags (that can be laminated for reuse) and store name tags. I also included some blank ones so it is more custom to your personal style. 
I used double sided tape for categories I know I'll keep around as their own page...
For most categories I used paper clips to keep things flexible within the inner workings of the binder. That way, as coupons change in and out I can keep things clearly labeled. I hope these will help you as you organize your coupon loveliness too! Please leave a comment if you do use them and tell me what you think! (or you could leave a comment anyway.)


 There are a variety of different sections but I made sure to include a "Favorite Stores" section to keep my store coupons separate from my manufacturer's coupons. It helps me know where I need to pick certain items up.

As for the "Use by ___" labels, I am not yet organized enough to use them fully. I saw them while internet surfing and thought they were a good idea. Laminate them and use a dry erase marker to keep track of expiration dates, etc. 

Hope you like it! Please,let me know if you do use it! And good luck organizing! 

Sunday, July 15, 2012

Vital Records Section 1 + Printables


This week I am focusing on Section One of my Vital Records binder: the Address and Contact Section. It seems to me that this will be important to have any number I might need at my fingertips in case I don't have my phone for some reason. Plus, having these all in one place makes it super convenient when I need to quickly look something up... I think of it as a personal yellow pages.

Being the OCD that I am I like my pages to match. At least closely... I could not find anywhere that combined all the things into one place for me. So I have created my own pages and being as excited and generous as I am, I would like to share these with you as well. Yes, I AM a nerd.

First, I'd like to gather some of the most important numbers. Just remember I.C.E. (In Case of Emergency). These are the most important numbers. And so my section will look a lot like this:


Addresses Supply List:
·        I.C.E.- In Case of Emergency phone numbers* (print out on both sides of the page for a one-stop-shop for all my number needs!)
·        Contacts: Family & Friends* (a sort of directory for my family as well as my husband's family)
     Ward & Stake Directory (from lds.org)
·        Business Contacts* (I keep track of doctor's numbers, etc.)
      Business card sheet protector (for the business cards of businesses important to me...)
·        Christmas Card List* (It will be saved and I will be glad I don't have to start from scratch if I lose my computer.)

*printable template

Print out as many copies as you need. I used them to create a sort of address book. Hope you find these helpful. Please let me know if you like them (or if you don't... just please, be nice about it...)! 

I have some other organizing projects coming up! I can't wait to get them underway! Keep an eye out for some coupon-ing love! 

Monday, July 9, 2012

Vital Records + Freebie

With the western states up in flames, it calls to question just how prepared and organized I am for a possible evacuation. What would I grab if I had 30 minutes before I need to leave? 10 minutes? mere moments? Would I have all the documents and important items that we'd need in case we couldn't go back?

It has sparked (sorry, pun not intended) the motivation I needed to put one of my planned projects into action. The Vital Record's Binder. A collection of the important documents and information we might possibly need. It takes so much less time to grab one binder than run around the house trying to remember in a hurry.

I have not completely finished collecting everything, but as I finish it I am excited to share it with you. That said, I have done some looking around for ideas and inspiration on this particular preparedness project. One of the best ones I've seen is here at (a favorite preparedness blog of mine) Prepared NOT Scared. There are also some great page ideas over at Your Own Home Store and All Things Simple. You can also check out my Pinterest board here for more links to ideas.

It can be a little daunting to take on a task that seems so important and vast as emergency preparedness, but if I take it one step at a time, it seems plausible... I am also a very visual person, aesthetics is key in getting me excited about something.

Step 1 for me then is to: start with some structure and the organization, and I had to make it cute. So here is my freebie for you! Its one of my first so I am very excited to share it!
Vital Records Cover and Tabs
Pictures and specifics to come. But for now, All you need to get started is:

  • a binder. (At least 1.5". I am working on mine and am thinking 2" or even 3" will give me a little more available space to work with... depending on how much stuff you want to collect.)
  • page protectors. (Costco has the best deal on these as you can get 250 sheets for about $12.)
  • card-stock paper to print the tab dividers on. (or you can have it printed someplace like Kinkos or something... if you do, let me know if it works! I'd like to know)
  • Tabs. (you can purchase a package of tabs that stick to your page protectors. They come in packages either clear or colorful. I used Martha Stewart's line from Staples. They are cuter... and easier to use!)
Step 1: Print off the divider pages and add them to your binder in the order that you choose. (I purposely made it so the order could be fairly flexible)
Step 2: Add tabs to divider pages
Step 3: Begin collecting the important documents that you know the location of. The individual pages have more specific guidelines and ideas that could be helpful as you start your collection. 

I compiled a list from a few different places to create my list of useful documents. Personally, I do not have all the sorts of documents that others might, so I tried to include those that anyone could have. Let me know if I'm missing any you might think of... I have thought of creating a blank one (so it can be filled in individually as you go). Let me know if you think that might be a good idea. 

Please, let me know if you use it, love it, or find any typos! (Especially as this is my first-ever freebie!) Leave me a comment! I LOVE comments. Good Luck!

Tuesday, May 15, 2012

Sweet Sixteen

My darling SIL recently turned 16. I had some trouble coming up with something to give her. Then, I remembered the "survival kit" that I received when I was in her place a few (or so) years a go... So I amped it up a notch (or two) and came up with my own version of a "Sweet Sixteen Survival Kit."


I found this amazing box at ROSS and spent some time experimenting with different things to fill it up. I had my "Prince Charming" from my single days that I thought should finally be passed on... and I made her some custom jewelry, and made some cute tags with the "survival tips" to attach to everything.


Some of the items that were in this kit were:
Prince Charming- to remind you of the qualities you are looking for.
Body Lotion set "Pamper"- Take some time for yourself once in a while. 
Nail Polish- enjoy a little color in life
Jewelry- You are unique and very precious
Key- The Keys to your success are held by YOU!
Life Savers- Everyone needs a little help sometimes.
Kisses- For us to share our love for you. For you to share (or not)
Nut Roll- Its ok to be a little crazy sometimes.
Bandages- To heal any hurt.
Among a few others. 

If you want to use the tags for your own birthday (doesn't have to be a sweet 16) I have a little printable for you! All I ask is for a little comment love if you do use it! Let me know what you think! 

Sweet Sixteen Survival Kit PDF Here
Enjoy!